


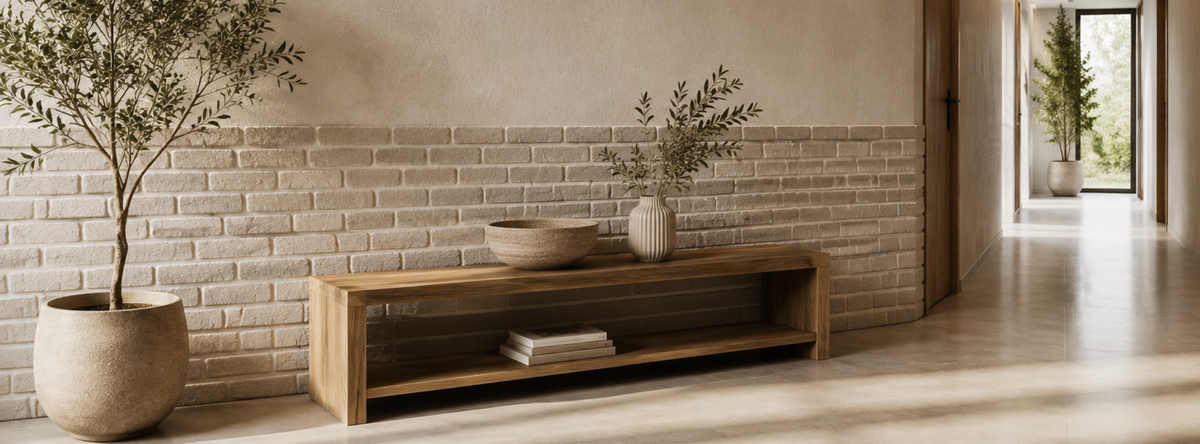
A brick or stone wall can become a focal point, but you may want the look without installing brick or stone pieces. A reusable stencil offers another way to build a masonry-inspired pattern on a prepared wall. Before starting, you need to choose the right design, size, finish and application method for your project.
Quick Answer
To create a faux brick or stone wall with a stencil, secure a suitable template to a prepared surface, apply the compatible paint or decorative material through its openings, and repeat the pattern across the planned area. A stencil defines the shapes and spacing. If you want an impression pressed into a wet finish instead, a silicone stamp or mat serves a different purpose.

What Does a Brick or Stone Wall Stencil Actually Do?
A stencil is a reusable template with openings that form the design. For a brick effect, those openings help create an organized arrangement of brick shapes. A stone or masonry stencil uses a different outline to suggest individual stones.
The final appearance also depends on the material you apply. Paint creates a flat pattern. A stencil variant intended for decorative plaster can be used to form a raised design, provided the wall, finish and application method are compatible. Check the selected product variant before buying: a version offered for painting may differ from one offered for plaster.
DFAdecor’s Facade Bricks collection includes brick, wild stone and masonry patterns. Despite the collection name, choose a product by its actual design and listed application rather than assuming every stencil is intended for the same finish.
Wall Stencils vs Silicone Stamps
Both tools can contribute to a masonry-inspired wall, but they work differently.
| Tool | What it does | Consider it when… |
|---|---|---|
| Wall stencil | Guides where paint or a compatible decorative finish is applied | You want defined brick or stone shapes in a planned arrangement |
| Silicone stamp or mat | Presses an impression into a suitable wet material | Surface texture is a central part of the result |
A stencil helps organize the pattern. A stamp adds an imprint. Some projects may use both, but that requires compatible materials and a technique suited to the specific tools. For a closer look at the second method, read DFAdecor’s guide to silicone stamps and mats.

How to Plan a Faux Brick or Stone Wall
Choose the area first
Decide whether the pattern will cover an entire wall or one section, such as the space behind a sofa. Measure that area before selecting a stencil. This helps you judge the scale of the pattern and how many repetitions the design will need.
Match the pattern to the result you want
Brick patterns usually create a more regular layout. Stone and masonry patterns can have less uniform outlines. Look at the dimensions of the actual stencil and its individual shapes, not only a room photograph: the same motif can feel very different on a small panel and a large wall.
For example, DFAdecor lists a Facade Bricks stencil for decorative plaster and a Stone Masonry stencil with separate painting and plaster variants. These are examples of the two design directions; check each listing’s size and selected variant for your project.
Choose the finish and wall location
An interior accent wall and an exterior facade face different conditions. Select the decorative material, surface preparation and any protective finish according to the instructions for that material and location. Do not assume a method suitable for an indoor wall will perform the same way outdoors or near heat and moisture.
How to Apply a Wall Stencil for a Masonry Effect
The exact method depends on the chosen stencil and finish, but the project follows a useful sequence:
- Prepare the wall. The surface should be clean, dry and stable. Address loose paint or other surface problems before applying a new finish.
- Plan the layout. Mark a level starting point and check how the pattern will meet corners, edges and visible features.
- Secure the stencil. Position it flat against the wall using a method suitable for the surface and stencil.
- Apply the chosen material. Follow the stencil listing and the paint or plaster manufacturer’s directions. Avoid applying more material than the design requires.
- Remove and reposition the stencil. Follow the application instructions for timing, then align the next section carefully with the previous one.
- Let the finish dry or cure. Use the material manufacturer’s stated time before further painting, cleaning or sealing.
Test the method on a sample surface or an inconspicuous area first. It gives you a chance to check the color, edge definition and material behavior before working across the wall.

Where Can a Faux Masonry Pattern Work?
A single interior accent wall can give a brick or stone pattern a clear place in the room without covering every surface. An entryway or hallway can also be a manageable area for a repeated motif.
For an exterior wall, the design choice is only one part of the project. The substrate, weather exposure, finish and installation requirements matter as much as the stencil itself. Follow the specifications of the materials you use and seek qualified advice where the wall needs repair or a specialized exterior system.
A stencil creates a decorative effect. It does not turn a wall into structural brickwork or natural stone cladding.

Choose the Pattern Before You Buy the Materials
Start with the appearance you want: regular brickwork, irregular stone shapes or another masonry-inspired layout. Then compare stencil dimensions and confirm whether the selected variant is intended for paint or decorative plaster. Once you have chosen the tool, check the requirements of the finish you plan to apply.
You can explore the brick and stone stencil patterns at DFAdecor. If an imprinted surface is closer to your goal, continue with the silicone stamps and mats guide before selecting a tool.
Share:
The Magic of Reflection: How Mirror Elements (Ornaments, Figures, Symbolism) Transform Interiors
How to Clean and Store Reusable Wall Stencils